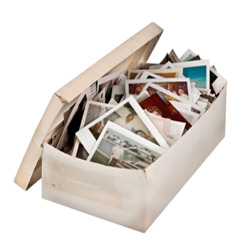
You likely have some old photos in photo books somewhere, or more likely somewhere in a shoebox, closet, or bottom of a drawer. These unappreciated treasures won’t be around forever, at least not in their original condition. It might be time to turn these priceless moments captured in the days of film into digital files that can enjoyed for many years to come. Digitizing your old print photos isn’t the monumental task you think it’s going to be. Here are some tips to get you started:
Select a Scanner
While there are various way to convert your photos to digital, the easiest way is to use a scanner. You have two choices when it comes to how you chose to scan your photos: a film scanner or a flatbed scanner.
Dedicated (Film) Scanner
If you have lots of photos, dedicated film scanners are good since they can handle mounted slides and strips of film. Pros and cons include:
- Pro: You get all the detail of the original from the negative or slide.
- Con: It’s blown up more than a printed image, so the smallest flaw is very noticeable.
- Pro: A good scanner will cost about $200, but you’ll get great quality.
- Con: Cheaper models are available, but you sacrifice quality.
Flatbed Scanner
Most people tend to choose a flatbed scanner. It can also handle negatives and slides, but you won’t get the same quality you’d get from a dedicated film scanner. These scanners work similar to a good quality copying machine. An illuminated scanning bar moves past the face-down image on a glass sheet. The digital data is then saved to your computer. Pros and cons include:
- Pro: Flatbed scanners are cheaper than dedicated scanners and do about the same thing.
- Con: If quality really is an issue, a dedicated scanner is a better choice.
- Pro: If you just want to preserve your print photos, a flatbed scanner works just fine.
- Con: You have to make sure each photo is adjusted just right so it fully scans.
Removing Imperfections
Once you choose a scanning method, the next step is to remove any blemishes and correct any imperfections you want to eliminate or reduce. Keep in mind, if the original photo is really poor quality, you’re not going to be able to correct it to perfection. There are many programs you can use to adjust your photos. Most people use PhotoShop, but you can purchase programs such as PhotoShop Elements that give you more detailed options. As far as resolution goes, the higher the setting, the larger the file. Some things to consider when fixing your old photos once they’ve been scanned:
- Scan all photos in color, even the black and white ones. You get richer patterns to work with when fixing them up.
- You can download certain apps and tools to fix imperfections like red-eye or small imperfections that need to be edited out.
- Keep all originals until you have the digital versions fixed the way you want them to look. If you make a mistake or forget to save the original version you scanned, you can always go back and rescan the original again.
Storing Your Scanned Photos
Most people save scanned photos in JPEG format because it’s a compressed format that makes it easier to save, store, and share your digitized photos. If you use the uncompressed TIFF format, you’re going to have larger files to store. Regardless of which file type you choose, a practical solution for digital storage of these any many other file types is to use a cloud service to store your photos on a remote server. There are many cloud storage options for your photos, as well as your other online documents of all kinds, such as Dropbox or Google Drive. Cloud storage and cloud computing gives you much more space than you normally have on your computer’s hard drive and allows you to access your photos from any Internet connected device.
Hire a Professional
It’s going to take some time to scan your photos since you have to scan them one at a time. If you don’t really have that many print photos you want to digitize, scanning is fine. If, however, it turns out that you have too many photos that need converting and not enough time to scan them all, you might also be interested letting a professional digitize your photos. For a reasonable fee, you can have a pro use more high-tech equipment to scan your photos and professionally remove any blemishes. It’s likely to be a one-time expense and it’s worth it if you don’t have the time to do it yourself. Once finished, you can store your scanned photos on your hard drive or cloud storage account, and cherish those memories for years to come.

