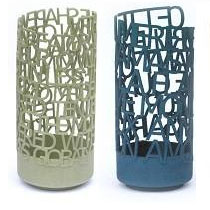
Shapeways is a fantastic service that enables anyone to access digital manufacturing processes to create three dimensional objects. This then means that if you’ve always had a design in your mind for a strange kind of mug, or an amazing ornament or gadget for your desk, or even have an idea for something you think could sell and make you some money – that you can have it made professionally in a material of your choice without having to have a knowledge of digital manufacturing techniques yourself.
This then means that as an individual as a hobby or as an entrepreneurial pursuit, it’s now possible for you to go manufacture the same kinds of products that you might previously have thought of as the sole reserve of the big businesses. But of course to take advantage of this, you also need to know how to create those 3D models in the first place. Here we’ll look at how you can get started.
How to Create a 3D Model
3D printing services like Shapeways require you to send in exact specifications for the objects you want cut. For this they ask you to send models that are designed using 3D design software or ‘CAD’ programs (CAD standing for Computer Aided Design). These files will have extensions like ‘3DM’ or ‘STL’ (Shapeways only accepts the latter of the two) and can be created using software like Rhinoceros or the free alternative ‘Blender’. There are many other software packages available cheaply or for free and a quick Google search will point you in their direction.
When you load up these programs you will normally be presented normally with a grid or potentially four grids that you will then be able to draw on. Using the four views, or by altering the view you will be able to draw in different planes. So in other words if you draw a square on the first one (which is normally top-down view) then you’ll have a flat two dimensional square – but if you draw a square in each of them you’ll have five sides of a cube. To add on the top, draw a square on top of the first one you drew using the top down view, then select the edge of that square in one of the side views and move it up so that it’s at the top. The grid squares of course are measurements and will dictate how large your item is when printed.
It’s also important to remember with these kinds of programs that you need to fill in the outlines to make surfaces (if you’re using the line tool) and that you need to blend the various pars together so that they are connected using the ‘boolean union’ tool. This is the basic gist of what you need to know, but you can learn a lot more by watching YouTube videos on your favourite modelling program.
Making it Real
Now you have your 3D design and you’re happy with it it’s time to get it made. To do this you need to make sure first that your object is made from one single part (if your design has multiple parts then you’ll have to order them separately and then assemble them yourself) and that the file is saved as a .STL. Now sign up to Shapeways (it’s free) and upload the file to see the render. Once you’ve chosen the material it’s simply a matter of paying and inputting your address and it will be with you in a short while. As a tip though, it’s always worth ordering a smaller prototype in a cheap material to make sure your concept works before sending off for the full-scale object or putting it up for sale.


